Smoke detectors play a vital role in maintaining a safe home. They are usually placed in high areas in various rooms in the home like ceilings. Many detectors will chirp or make some noise, oftentimes annoying, when the battery needs to be replaced. It is a good idea to keep a regular schedule to essentially replace the batteries in the smoke detectors all at once each year. Many smoke detectors also have a test function that youcan be used to verify each smoke detector is working properly. Checking your smoke detectors to make sure they are working properly can also make the difference between you and a fire that blazes causing serious injury and home damage.
Changing smoke detector batteries
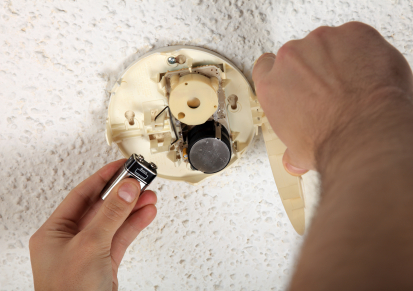
To change your smoke detectors batteries you will need to safely climb up a sturdy step ladder to reach the smoke detector. If you have very high ceilings, you will need to use a standard longer ladder and when doing this, practice ladder safety. Depending on the model of your smoke detector, most will require a counter clock wise turn to detach it from a clip. Typically, you will have to disconnect a wiring harness from the back that you can either use your hands or carefully pry away with a flat head screw driver. Be careful to not damage the ceiling when opening your smoke detector.
On the back of the smoke detector, open the door and replace the existing 9 volt battery with a new 9 volt battery. Some smoke detectors will use AA batteries and replace them accordingly. Always replace smoke detector batteries with new batteries to protect against and potential danger. Reconnect the wiring and the lid of the smoke detector. Then carefully attach the piece back to the piece on the ceiling. Next, press the test button and you should hear some chirping which indicates that the smoke detector is working. If you do not hear a chirp, try a different battery.
With fresh batteries and tests, you are now ready for any smoke emergency.

