Many HomeZada customers have asked for a detailed print of a specific inventory item. The request is printing a detailed view of each inventory item that can be shared with insurance agents, estate planning attorney’s, or property managers.
HomeZada has made this enhancement so that it is available for “Homeowner” accounts that are on a Premium or Deluxe paid subscription, and for “Professional” accounts. This printing feature is available for people who connect to their HomeZada account with a table, laptop or desktop.
You access this printing feature by walking through the following steps:
Step 1:
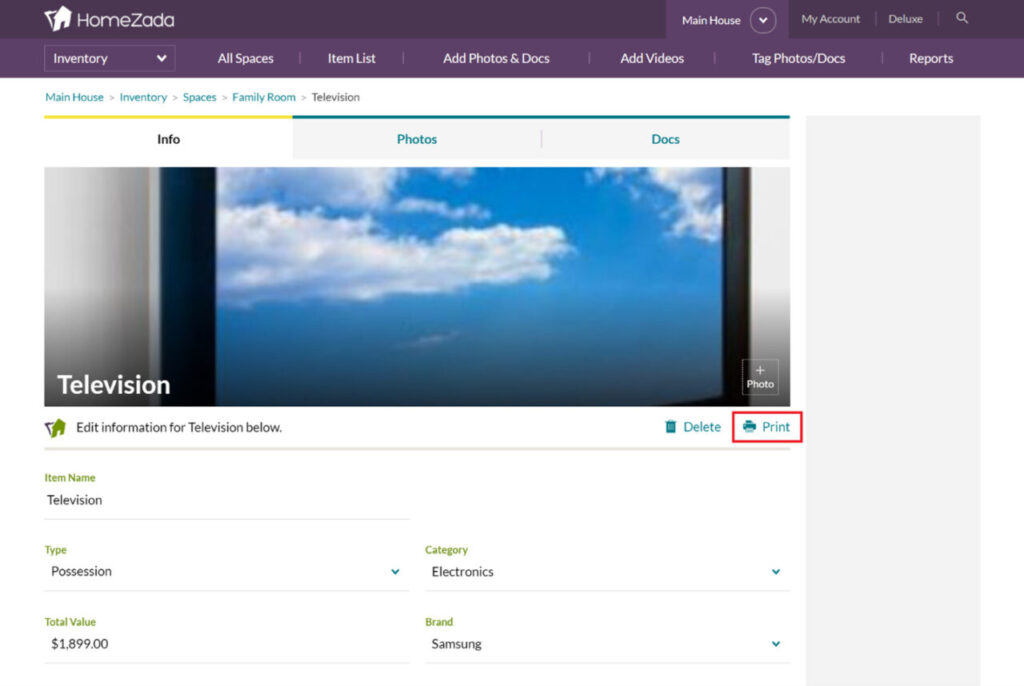
When you navigate to a specific inventory item, there is a “Print” menu item under the main photo on the right side of the page. This will create a print of the current item.
Step 2:
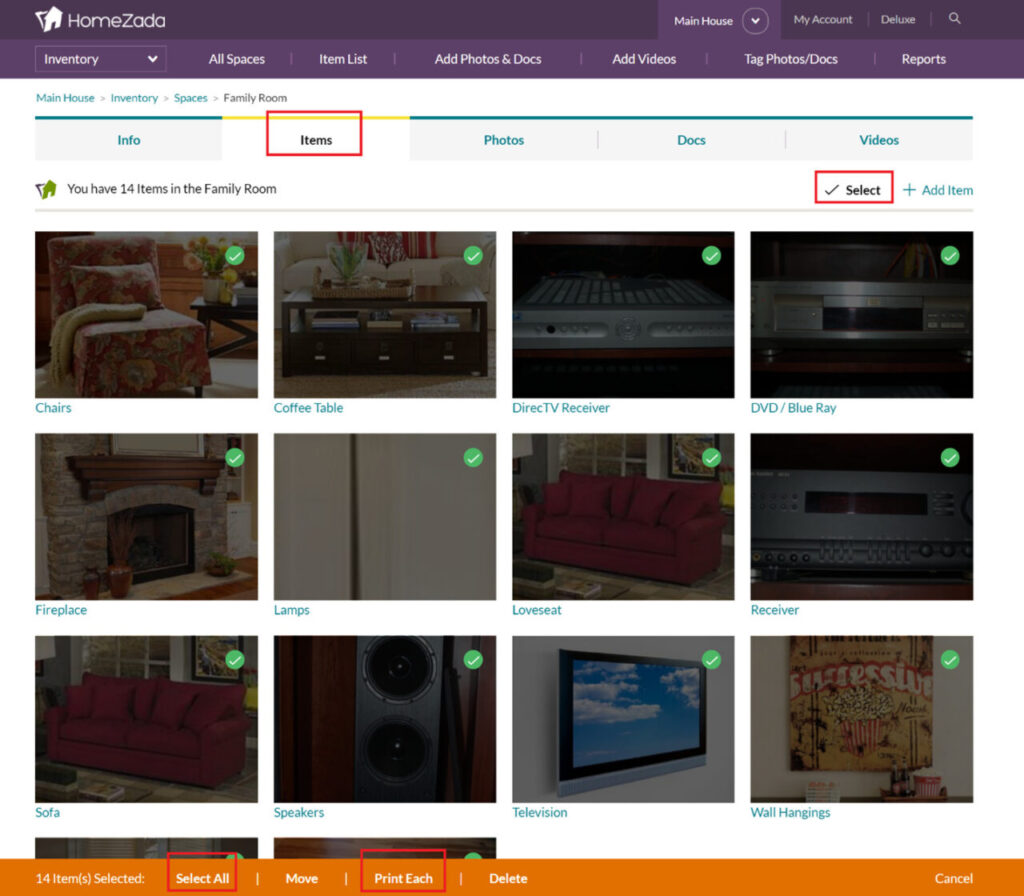
We have enabled the ability to select all or multiple items within each space. This is helpful if you want to create an individual print of each item for all the items in a specific space. This feature is available when you navigate to the “Items” tab of a specific space. Then click on the “Select” menu above the gallery of items on the right side of the page. You can then click on “Select All” in the orange menu bar at the bottom of the page, or you can select only the items you want to print. When all the items that you print have a green checkbox on them, then click on the “Print All” menu item in the orange menu bar at the bottom of the page.
Step 3:
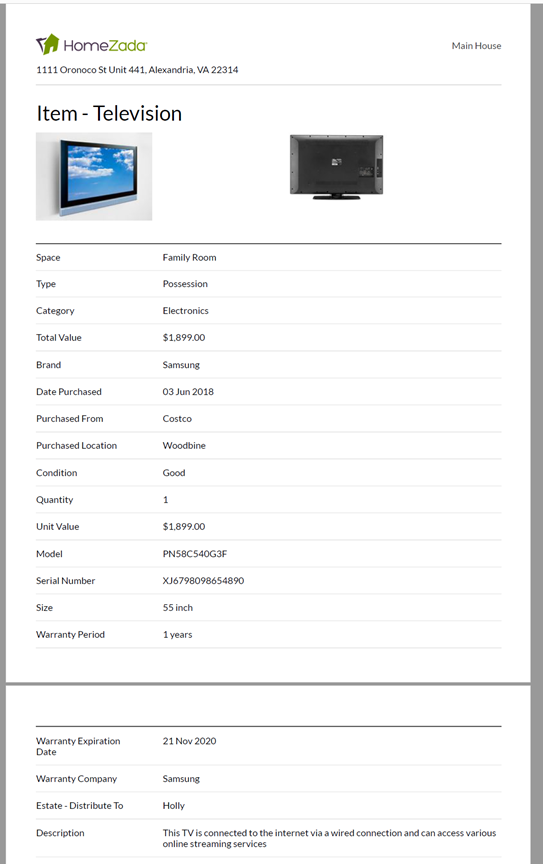
If you install a print to PDF print driver, you can create a PDF of all these individual inventory items. The PDF document will show the thumbnail photos of the item at the top of the page, and then it will print each field that has data enter in it. See the example below.
For additional HomeZada feature details, check these out:


