Have you considered creating a wall mural for a room in your house or your kids’ bedroom(s)? While you can buy stick-on murals, why not try your hand at creating one by hand?
Materials
You’ll not only need paint, but there are several supplies that will make this project much easier. Before starting, make sure you have all the necessary tools on hand – nobody wants to run to the store in the middle of a project because they forgot something!
Keep in mind that for the paint to stick to the wall, it is essential to use premium acrylic paint and a primer such as gesso.
Last but not least, make sure you buy WATER BASED sharpie paint pens rather than oil-based ones.
Here’s the list:
- ⬥ brushes
- ⬥ roller
- ⬥ gesso (primer)
- ⬥ acrylic paint
- ⬥ sponges
- ⬥ paint thickener (eg. Liquitex)
- ⬥ painters’ or washi tape
- ⬥ sharpie pens for tracing (water based)
- ⬥ varnish (to seal and protect)
Prepare your design
You will need a plan before you can start the painting process or the actual painting part. Pinterest is a great source for ideas.
Even though you might be tempted to embrace your creative side and jump right into painting, the best murals require a lot of careful planning before you pick up a paintbrush.
How to prep the walls
Preparation is second only to having high-quality supplies in importance. In order to ensure that the walls are smooth and clean before painting, you’ll want to do it correctly the first time.
Open a window, make sure there are no kids or pets present, and prepare a small mixture in a bucket of warm water.
Use TSP to scrub the walls thoroughly. Wear gloves and safety glasses. The TSP mixture should be applied with a cloth to clean the walls. To get rid of any leftovers, go over the walls once more with a clean, damp microfiber cloth.
Next, fill in any gaps. To fill holes, use joint compound or DAP. Make sure to fully dry them before you sand them.
Apply a fresh coat of paint or primer to your walls
Remove or cover any furniture in the area, paying close attention to the floors. Use drop cloths to prevent spills, which can be a nightmare to remove from hardwood, carpet, curtains, etc.
Next, tape off any doorframes, baseboards, or vents with painter’s tape.
Prime the wall with a product such as KILZ or Zinsser Bulls Eye 1-2-3. You can use painter’s tape to divide up your mural into different sections or to make patterns after the primer has dried.
Paint the background color of the mural just a little bit over the tape to prevent bleeding through for extremely clean lines.
Choose your painting style
While there are many ways to paint walls, the theme of your mural may dictate whether you use a brush to paint the walls freehand, a sponge to apply color in layers, or stencils to create a pattern.
Start your mural
Create a rough draft of your wall mural design plan on a piece of paper. Imagine it.
Then, measure the area…don’t skip this crucial step. If you’re hand painting, either map out a light grid and sketch out your composition first, or start with a high-resolution graphic of your piece of art and use a projector for correct placement.
Put it in pencil on the wall, using a good drafting or construction pencil. This allows you to make any necessary corrections or revisions with an eraser.
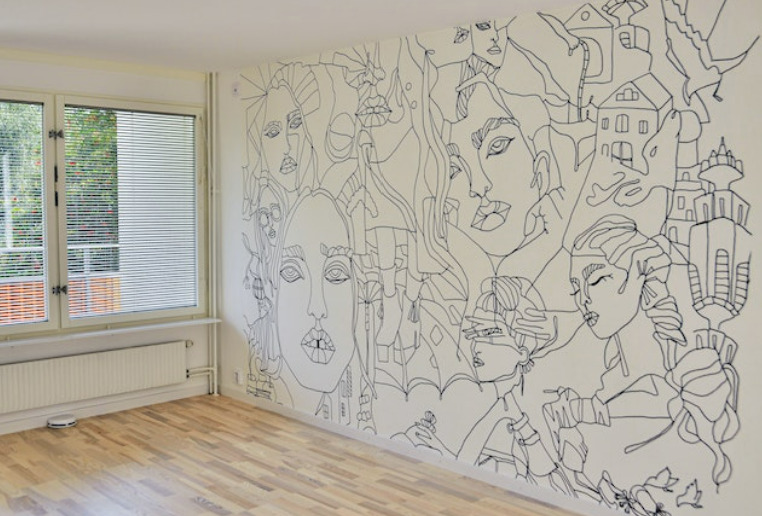
Take a step back once you have penciled in the entire mural and make any necessary adjustments. Then, once you’re satisfied with your mural, outline the focal points of the wall mural with the water-based Sharpie paint pens. Next, using the fine point Sharpie paint pen, gradually add more details.
The wall mural’s expansive background should be tackled first. For large areas, apply more than one coat, allowing time for drying in between coats.
It doesn’t have to cure, but it shouldn’t be touchably wet. Layer colors and focus on more intricate areas of the mural after the second coat is dry. Finish by incorporating darker and lighter hues to add depth.
If needed, to thin wall mural paint without making it too watery, combine acrylic paint and gesso. This will help it adhere to the walls without running.
Use only one color at a time. Be prepared to work quickly and with just one color at a time because gesso dries fast. This means that you should be able to layer colors fairly quickly in between coats because the drying time is so quick. Repeat with the next color and layer once the first color is finished, then keep going until all sections are finished.
Tips:
- ⬥ To fill in the substantial areas that make up the background, you should probably use a roller.
- ⬥ Then, for large patterns, switch to large brushes (such as a 4-inch brush).
- ⬥ Sponges are a simple go-to for subtle texture.
Preserve your work
Finally, you’re finished! Now it’s time to save all of that hard work.
In order to add sheen and preserve the integrity of the mural, seal it with a spray sealant. Look for an archival varnish that is clear, water-based, and matte finished.
Lightly spray a thin layer in a smooth, sweeping motion to apply. One coat works best.
5 Clever Decorating Ideas for Your TV Wall