Renovating your home can become costly and time consuming. That said, hardwood flooring is often a rewarding add-on to a home. It not only adds beauty but also lasts for decades to come, offers durability, and adds resale value. Here are a few tips for installing brand-new hardwood flooring in any room in your home.
Choose Your Wood Carefully
One of the best tips for installing brand-new hardwood flooring is to make sure you choose the right kind of wood. Hardwood comes in many different grain patterns, wood species, plank sizes, and finishes. It’s good to know if you want solid hardwood or engineered hardwood as well as how much of it you may need. Whether you choose to renovate the kitchen or the entire house, prepare ahead of time and ask the experts.
Acclimate Your New Flooring
Wood movement occurs when moisture levels cause wood to expand or contract. After purchasing the hardwood, you want to acclimate it in the space where you’ll install it. Wood that isn’t fully acclimated will result in gaps during the wintertime or cupping in the summer. It’s essential to open and spread out the boxes for about a week, keeping your house at normal temperatures. Once the wood has properly acclimated, it will be able to adjust to changing moisture levels.
Prepare the Subfloor
After removing the old flooring, make sure you prepare the subfloor. The biggest goal of preparing your subfloor is making sure it remains flat, clean, dry, and level. If you don’t do it right, your new flooring may become damaged.
During this process, keep an eye on moisture content with a moisture meter, clean off any debris or leftover flooring, and check the level of your subfloor. If it isn’t level, line your subfloor with plywood for wooden subflooring or with a self-leveling compound for concrete subflooring.
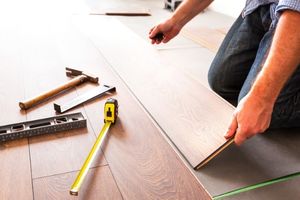
Lay the First Row of Boards Straight
Laying your first row of hardwood straight will give you a consistent, seamless row to follow. If you have a crooked starting row, it can result in large curves in each row’s progress. Because not every exterior wall is square, mark a line parallel to the inside wall opposite your starting point. From there, continue to mark the locations of your joists and perpendicularly install the hardwood. Keep each joist fastened at every opportunity, and stay wary of existing obstacles.
Hardwood flooring doesn’t have to result in stress and wasted time. Make sure you consider all the steps provided, and your hardwood flooring will look stunning for years to come.
Buying Reclaimed Hardwood Flooring…Is it Worth It?