If you’ve decided that this is something you’d like to pursue you don’t have to spend thousands of dollars to create the perfect recording studio at home.
All you need is a basic understanding of what it takes to create professional-level video and/or audio and a little ingenuity to get the results you want.
1. Location
For example if it’s only going to be you, a small closet or corner of a room should suffice. But if you plan to have guests, or you’ll be playing music with other people you’ll need a bigger space.
The room you choose for your recording studio should be comfortable; cool in the summer and warm in the winter.
2. Add furniture
When possible, add furniture that’s covered in cloth. The cloth acts as a sound absorber, preventing echos and potential feedback or distortion when you’re recording.
Of course if you set your studio up in a corner of a room this may not be an issue as you may already have furniture in place.
3. Add soundproofing
If you have a hard surface floor, set out space rugs, especially underneath your chair and your desk. The best case scenario would be to install absorption panels on the floor but if it’s carpeted that may suffice.
To help even more with sound absorption you can choose to hang wall treatments such as fabric panels or curtains over the windows.

Alternatively, sound absorption panels are available that can be installed wherever you need to improve the sound quality of your recordings.
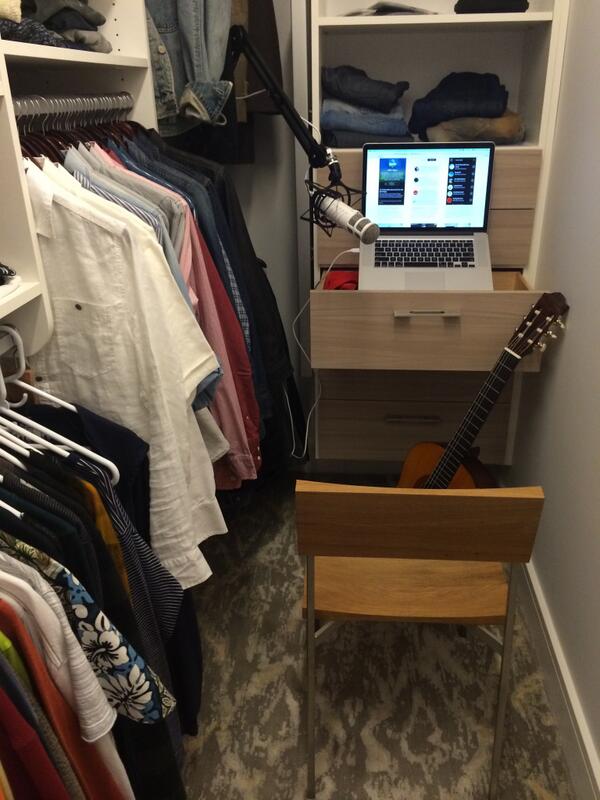
4. Use your closet
A small space is easier to manage than a large space when it comes to setting up a “recording-friendly” place. Your closet could be a good option for your recordings if it will only be you or someone you’re speaking with online.
As you can imagine, the clothing and the small space of your closet work well to create great video and audio recordings.
5. Make a DIY vocal booth
Take a look at the image below…this should give you a good idea of what’s possible to get the recording that you need.
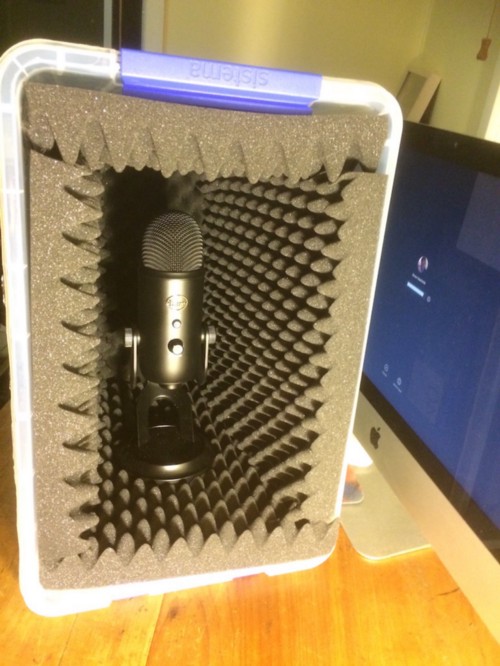
Not only is this an expensive option, but it can be tucked away out of sight when you’re not using it.
Also, this will help even the cheaper microphones sound good.
For video, pay attention to your background. Avoid clutter as much as possible because you want people to be focused on you, not the kids/pets/housemate walking around in the background!
Can’t change your background?
Then use a real or virtual green screen. Be sure, however, that you have adequate lighting to ensure a good quality video.
Another idea similar to this and/or the closet idea is to create a small tent in the middle of your room.
Using some kind of framework made with PVC, wood, furniture…whatever you have available…cover it with one or more thick blankets and you’ve created an instant studio.
Or, you can use a portable camping or painting tent that you cover with blankets. Another option; portable booths made for this purpose, however they can be pricey.
As you can see there are a lot of options for getting that perfect audio and video recording without breaking the bank.
Keep in mind all you’re really focused on is minimizing sound distortions, background noise and visual distractions.
Final thoughts…
For professional looking and sounding video and audio, don’t skimp on your mic and video tools. There are a lot of options out there at many price points, so choose what you can afford and that helps you get the job done.
Now get on out there and share your thoughts, your talents and your abilities with the world…we’re waiting!
Other work from home pieces can be found here:
5 Ways Office Feng Shui Can Help Reduce Stress at Work